Minelab Equinox 900
Equinox 900 Tone Profiles: How to Set Tones, Breaks and Pitch
Quick answer
The Equinox 900 offers a choice of tone counts, from a single tone through two and five tones up to fifty and all tones, plus adjustable tone break, pitch and volume. Two tones suits beach hunting, five suits parks, and all tones suits experienced relic hunters.
Audio is where an experienced detectorist gets most of their information, and the screen is a confirmation rather than a decision. Minelab builds the Minelab Equinox 900 around that idea: the machine gives you a choice of how many tones to divide the ID scale into, where the divisions fall, what pitch each region sounds at, and how loud each region plays.
The trap is thinking more tones is always better. More tones means more information and a longer learning curve, and a machine you cannot interpret is worse than a simple one you can. The right answer depends on the site and on how long you have been listening. Pair this page with the Equinox 900 target ID chart, because tone regions are just the ID scale cut into pieces.
Top pick
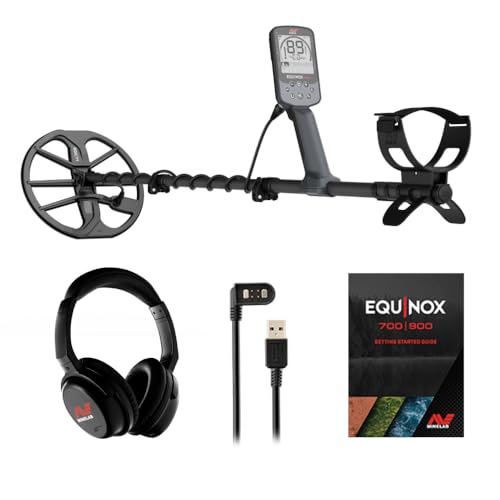
Minelab Equinox 900
Minelab pairs the 119 target IDs with adjustable tone counts, breaks and pitch, which is what lets you hear the difference between a nickel and a tab.
Price was accurate when this page was compiled and changes often.
On this page
Which tone setting should you run?
Tone count divides the ID scale into audio regions. Fewer regions means simpler audio and less information; more means the opposite.
Two tones is the simplest useful setting and suits beach hunting, five tones is the standard park and field choice, and all tones gives a pitch that rises continuously with the target ID.
| Tone setting | What you hear | Best for | Learning curve |
|---|---|---|---|
| 1 tone | One pitch for every accepted target | Hunting purely by screen, or by feel in dense trash | None |
| 2 tones | Low for ferrous, high for non-ferrous | Beach hunting, wading, beginners | Short |
| 5 tones | Ferrous plus four non-ferrous regions | General park and field hunting | Moderate |
| 50 tones | Fine divisions across the scale | Experienced coin hunters chasing small ID differences | Long |
| All tones | Pitch rises continuously with conductivity | Relic hunting and anyone reading targets by ear | Longest, and the most rewarding |
Tone options and their exact behaviour vary by mode and by firmware version. The Equinox 700 and 900 manual lists what your machine offers in each mode, and it is the authority over any chart.
What do tone break, pitch and volume actually control?
Three separate adjustments, often confused with one another.
Tone break sets where one audio region ends and the next begins, tone pitch sets how high each region sounds, and tone volume sets how loud each region plays relative to the others.
| Adjustment | What it moves | Typical use |
|---|---|---|
| Tone break | The ID value where one region ends and the next starts | Move the ferrous break so bottle caps fall on the iron side |
| Tone pitch | How high each region sounds | Separate two regions that sound too alike to you |
| Tone volume | The loudness of one region relative to the others | Turn iron down without turning it off, so it is still audible as information |
| Target volume | Overall loudness of accepted targets | Set once, for your hearing and your headphones |
| Threshold | The background hum between targets | Raise it to hear faint deep targets breaking through |
Available ranges differ between modes. Set them once for a site type and leave them alone, because constantly changing tone settings means you never learn what any of them sound like.
Why should you turn iron down rather than off?
Because silence tells you nothing. On an old site, the pattern of iron around a target is information: a good signal surrounded by nails is likely to be in an iron-rich layer, and a clean signal in clean ground behaves differently. If you reject iron completely you lose that context, and you also lose the tell where a bottle cap gives a broken iron grunt on one sweep and a clean tone on the next.
Turning iron volume down to a low but audible level is the setting most experienced Equinox owners settle on. You still hear the nails, at a level that does not wear you out over four hours, and you keep the ability to tell a masked target from an open one. Reducing iron volume also pairs well with a high recovery speed and a small coil such as Minelab EQX 06 Coil (6 inch), which is the standard trash setup covered on the settings page.
Do headphones change what you hear?
Considerably. The Minelab Equinox 900 ships with low latency wireless headphones, and latency is the reason detector headphones are a category of their own: ordinary Bluetooth delay makes pinpointing by ear impossible. Minelab ML105 Wireless Headphones covers the Manticore, Equinox 700 and 900 and X-Terra Pro from one pair, and Minelab ML 80 Wireless Headphones is the older Minelab low latency set.
For water work you need wired. Wireless audio does not pass through water, so a submerged machine needs Minelab Equinox Waterproof Headphones regardless of what is in the box. Detector-specific sets are voiced for faint signals rather than for music, which is why an expensive pair of consumer headphones is usually a worse choice than a modest pair built for the job.
How do you learn to read targets by ear?
Pick one tone setting and stay in it for a season. Most people switch settings every few hunts and never build the reference library in their head that makes audio useful. Five tones in a park or all tones on relic ground, held long enough that you start predicting the screen before you look at it, is worth more than any amount of experimenting.
Then use the test garden. Sweep known targets with your eyes off the screen and guess, then check. That is the only exercise that reliably builds the skill, and it costs nothing but an afternoon. The intermediate setup lists the gear that supports that kind of practice, and the guides section covers technique in more depth.
Sources
- Minelab Equinox 700 and 900 instruction manual
- Minelab Equinox 900 published product specifications
- Minelab ML105 and ML80 headphone product listings
Frequently asked questions
How many tones should a new Equinox 900 owner use?
Start with two or five. Two tones splits the world into ferrous and non-ferrous, which is enough to hunt productively from day one and almost impossible to misread. Five tones adds useful resolution across the non-ferrous scale without becoming a wall of noise. Move up to fifty or all tones once you find yourself wanting information the simpler setting cannot give you.
What is a tone break and where should I set it?
A tone break is the target ID value where one audio region ends and the next begins. The one worth adjusting is the ferrous break, because moving it decides whether marginal signals such as rusted bottle caps sound like iron or like coins. There is no universally correct value: set it against your own buried test targets in the ground you actually hunt.
Should I turn iron audio off completely?
No. Rejecting iron entirely removes the context that tells you whether a good target is masked, and it hides the broken, inconsistent response that gives bottle caps away. Turn iron volume down to a level you can hear without fatigue instead. You keep the information and you lose the constant hammering that makes an iron-heavy site exhausting.
Do the included wireless headphones have a delay?
Minelab supplies low latency wireless headphones with the Equinox 900 specifically because ordinary Bluetooth delay makes pinpointing by ear unworkable. The low latency sets are built for detecting rather than for music. They still will not work underwater, because wireless audio does not pass through water, so submerged hunting requires the wired waterproof Equinox headphones.
Does the tone setting change the target ID number?
No. Tones are an audio presentation of the same ID the screen shows, so changing tone count, pitch or break does not move the number. What it changes is how quickly and reliably you can act on the number without looking down, which on a productive site is the difference between covering ground and standing still.
Researched, not professional advice. This page is compiled from published specifications, manuals and owner-review consensus, not hands-on testing. Target ID numbers, depth figures and settings vary with soil chemistry, moisture, target size, depth, orientation and firmware version, so treat every figure here as a starting point and verify it against your own machine's manual and your own ground. As an Amazon Associate we earn from qualifying purchases.